


Sometimes we buy skateboards for the way they look, but over time we want to add our own customized flare. That's what part of the fun is about having a skateboard: we get to personalize it and make it completely our own.
Instead of buying a new skateboard with new wheels and trucks, it could just be easier to learn how to how to paint a skateboard. There are six easy steps you can take in order to paint your skateboard so that it can practically be brand new and show off the novel image you want it to show off.
This is cheaper and better than getting someone else to do it and you can take pride in the fact that you re-created your skateboard all by yourself.
How to Paint Your Skateboard - What You Will Learn

There are lots of tutorials online that can teach you how to paint your skateboard. We are going to cover blank decks as well as already has a graphic and/or painted on decks.
Lots of advice online on how to paint a skateboard comes from the form of videos, and lots of people learn better when they read instructions instead of continuing to starting and stopping a video to keep checking if what they're doing is okay.
You'll learn everything you'll need when it comes to painting your deck, how to prep, how to prime, paint options, conceiving your designs, and how to let it dry.
You may feel overwhelmed by this task, especially if it's your first time, but trust us, it's really not that hard. It's a lot easier than you may think, just as long as you follow these six easy steps. You will also benefit from the troubleshooting questions at the end of this article regarding how to paint a skateboard.
What You Need When Painting Your Deck

Before you start painting your deck, you are going to need the following items:
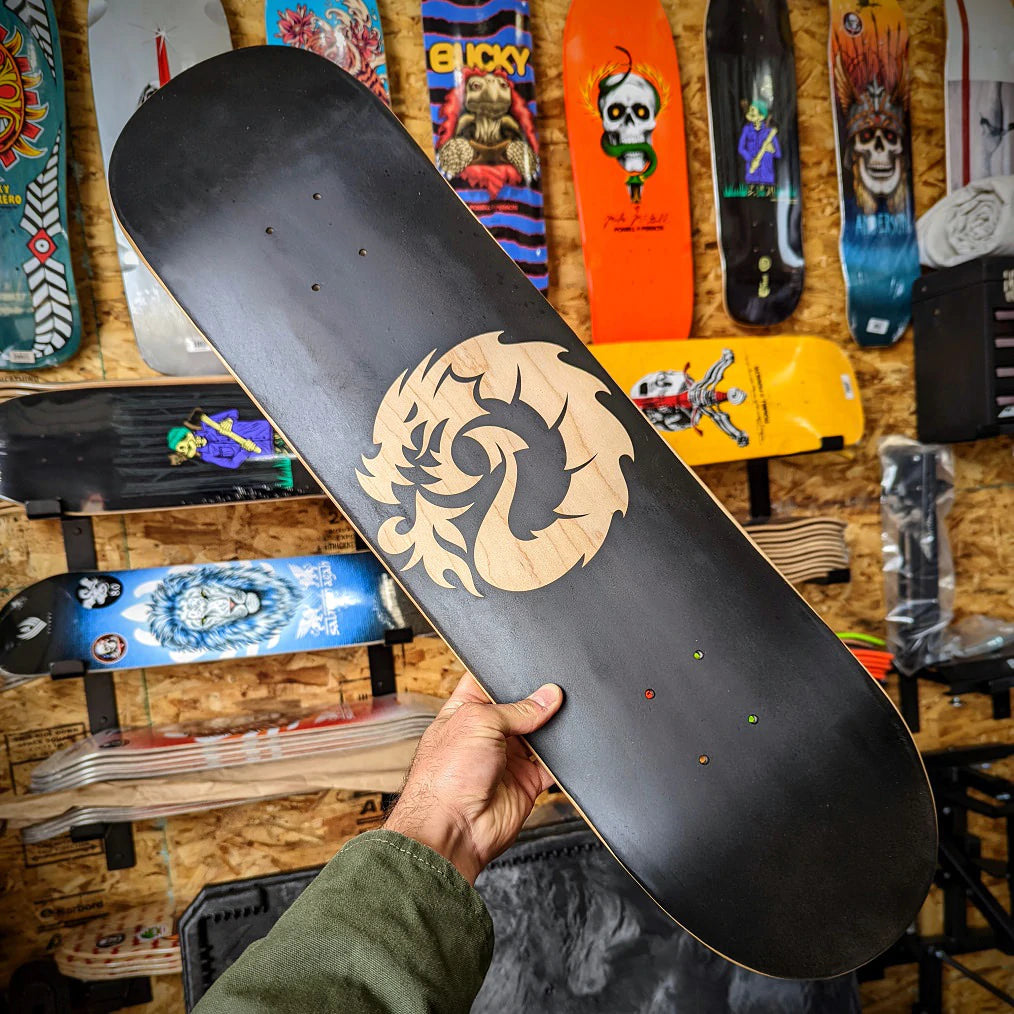
- Stoked Ride Shop Blank Deck - We recommend this board because we made it 😘 But really, it's made in America with Canadian Maple and comes in a few colors. It's legit, we back it 100%.
- A large, well-lit flat surface to work on
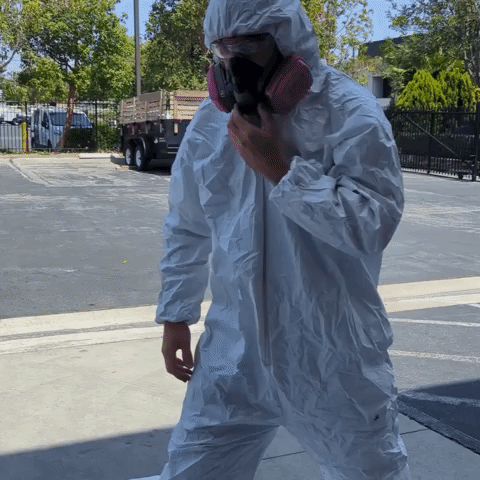
- Clothes or painting suit you don't mind getting dirty
- A tarp or some towels you can lay your skateboard on
- Electric sander with 150-grit sandpaper, 300-grit sandpaper, and 400-grit sandpaper
- Lint/fuzz-free rag
- Wood filling paste
- Painter's tape
- Aerosol primer
- Dust mask
- Stencils
- Grip tape
- Spray paint or acrylic paint
You can get the items listed on Amazon, Home Depot, and Michaels. These will best prepare you before you paint a skateboard.
Painting a Skateboard Deck in 6 Easy Steps
Even though we just mentioned a lot of materials, painting a skateboard deck doesn't have to be too complicated. If you follow the six easy steps mentioned below, you should get through painting a skateboard without much difficulty, even if its your first time.
Do not be overwhelmed - you can get through this! You will also probably be surprised at how quick you can get it done. We believe in you.
Step 1: Prep, Prep, Prep
Start by setting up your work area and making sure that you are wearing the correct clothes. The process of getting a skateboard ready to paint can create a large amount of sawdust and spray paint can easily get all over the surrounding area, including your clothes. Make sure you are dressed in clothes that you don't mind ruining.
Lay a tarp or drop cloth on any surfaces you want to protect. This is just absolutely necessary in the process before beginning to paint a skateboard.
Also, it's important that the space you are working is well ventilated. If you keep yourself in an enclosed area, the fumes from spray paint can build up and become toxic. Make sure you have plenty of airflow. Outside in open air is usually best.
To begin prepping the skateboard, remove the truck assembly from the deck. You are going to want the truck and its associated parts away from the board.
Loosen and remove the four truck bolts on both trucks using a skate tool. Turning the nuts in a counterclockwise direction while keeping the head of the bolt held in place with an allen key or screwdriver. Pull the bolts free and place the two trucks/wheels assembly in safe place.
If you are painting a skateboard that already has a graphic, it is best to remove the existing graphic before painting it fresh. You can do this by sanding it off the skateboard.
If you are painting a skateboard that already has a graphic, it is best to remove the existing graphic
Put your truck-less board on your work surface and turn it so the top of the deck is facing down. If the board has grip tape, use your tarp to protect your work surface. Grip can scratch surfaces very easily.
With the current design on the board should facing up, use your electric sander with 150-grit sandpaper and use steady, firm pressure to completely remove the original design from your board. This is just about it for the extent for woodworking, don’t worry!
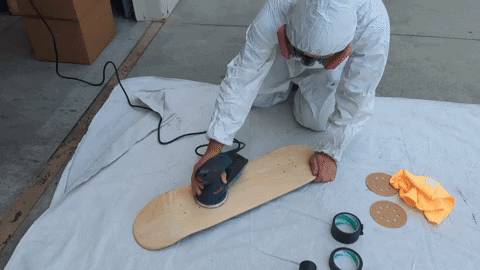
Use 300-grit sandpaper to give the surface of your board an even smoother finish. You want the board surface to be very smooth. It should be free of deep scratches. Deep imperfections will not be filled with primer and will show up in the final paint. Get all those deeper scratches smoothed out. Use the 400-grit if it needs an even smoother finish.
Here are some extra safety tips that you should adhere to:
- Always wear protective gear when sanding. Sawdust kicked up into the air can irritate or damage your eyes, throat, and lungs. Be sure you wear protective glasses and a dust mask.
- Be patient with this initial sanding. Quality prep = quality paint
- Let the sander do the work. Don't apply too much pressure or uneven pressure with your sander. Swap out sandpaper sheets as needed.
Quality prep = quality paint
Clear free any remaining sawdust. Use brush or lint/fuzz-free rag (microfiber works well) to clear away any remaining sawdust from your board. Be very thorough during this step. If you miss sawdust, it can cause clumping or other irregularities in your paint job and you are gunna have a bad time.
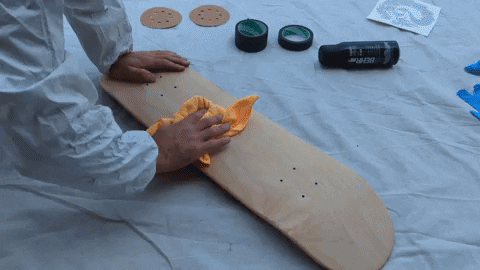
Avoid using wire bristle brushes or any other kind of brush that could damage the finely sanded surface.
Repair any visible damage to your board, if necessary. This can be done with carpenter grade wood filling paste, which you can find at most hardware stores. Mix and apply the paste to pressure cracks and chips in your board according to the directions of the paste. In most cases, you should apply a generous amount of paste to each defect in the board.
If there are irregularities in the paste, don't worry too much about them. This is because they will be sanded away later, so don't worry if your filler paste clumps. Allow the paste to dry as long as indicated by the directions; in most cases this will take about 24 hours.
If applicable, sand the repaired areas smooth. Again, using 150-grit sandpaper, use your sander to smooth the repaired areas of your board. Apply firm, regular pressure when sanding. It should only take you about five minutes before the wood filler is uniform with the rest of your sanded board.
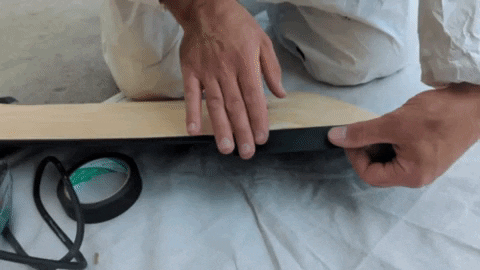
Tape any area on the skateboard you do not want to paint. This could include the sides and topside screw holes of your deck. Failing to tape the sides and top of your board might result in drips or streaks along the sides and grip of your board. Use painters tape to ensure the tape pulls free easily from the board.
Step 2: Primer / How to Prime
Apply your primer by using long, light sprays in the nose - tail direction of the deck. If you have not spray painted before, check out this guide for some pro tips. An ideal primer is aerosol primer. This is because aerosol primer will run less of a risk of an uneven application. Paint brushes loaded with too much primer can end up being too thick/thin in spots.
Be sure you follow the directions for your primer.
Be sure you follow the directions for your primer. Aerosol primers will need to be shaken and kept a certain distance away from the board while applying.
- Apply light and even coats.
- Be patient until your primer dries and then apply a second layer of primer to your board. Another layer of primer can provide an even better surface for the paint you will be applying.
- Make sure you shake it for the amount of time directed in its instructions. In most cases, you will need to shake the spray can for about 2 minutes. This gets the material blended and primed for the best coat.
- If too much primer is applied and it drips or bubbles, let it to dry completely and sand it smooth.
- Let each layer of primer to dry slightly after you apply it. Depending on the primer you have used the time will vary, but in most cases 20-30 minutes is long enough.
- Be sure to always wear a dust mask/respirator and protective eye-wear when spray painting to prevent accidentally breathing in the toxic spray or getting any in your eyes.
Step 3: Conceiving Your Design
Do you already have the exact image you know of what you want to be on your deck or do you need to do your research and decide what image you will settle on for your new board?
Ultimately, you'll most likely be using a series of stencils to apply layers of paint to your board. The unpainted areas left behind by your stencils will form the design of your board. A simple, stencil-free way of achieving the same effect involves covering areas of your board with tape in creative patterns.
Create a blueprint for your paint job. By drawing out the design beforehand, you are less likely to make a mistake when applying the paint. Take a piece of paper and draw the rough shape of the deck of your board. Then, inside the deck, sketch out your design.
By drawing out the design beforehand, you are less likely to make a mistake when applying the paint.
Beginners might want to stick with geometric designs, using squares, rectangle, triangles, and lines. The straight lines of these will be easier to create stencils for, or, in many cases, can be created with tape.
Label the colors for your design on your blueprint. Decide how many colors you want your board to have. For instance, if you want your board to have three colors, you'll need to apply three layers of paint, four colors will require four layers, and so on. Inside the designs you have created, number each design according to each layer.
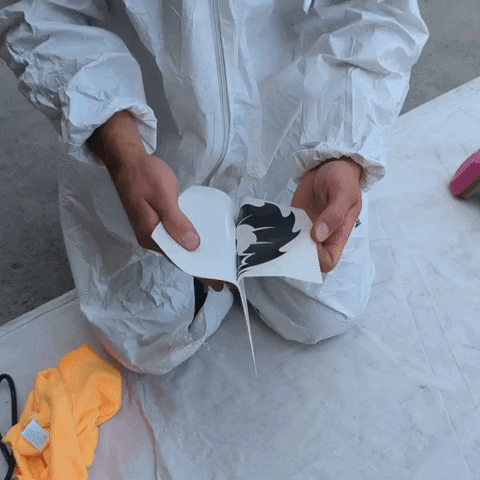
Create your stencils, if this applies to you. If you are just using tape to create designs in your board, then this doesn't apply to you. More complicated designs and shapes with arcs, like circles, will likely need a stencil.
You can make your stencils out of many different materials, including cardboard, mylar, vinyl or rigid card stock.
Attach your stencil or tape design. The places your cover with your stencil/tape will remain the color of your primer/base layer. The gaps in your stencil/tape will be painted the color of your next layer. Spray your second layer over the entire bottom of your board to ensure you have an even application.
 You might want to leave some extra tape extending beyond the edge of your board. For stencils/tape designs in the center of your board, you may want to overlap the ends of your tape, bending back one end to stick up from the board. This will make removing stencils/tape easier when you are finished.
Step 4: Painting and Paint Options
Now for the fun part! Remember, do not apply another layer until your first layer is completely finished drying. Once it is, then you are able to keep adding stencils/tape and new layers of paint to your board in this fashion to complete your design.
Be sure you follow the directions on your aerosol paint before using it. Lots of this paint will require you shake it for a certain amount of time and hold it a designated distance from the surface you are painting.
Lightly spray the base color. This color will form the background upon which you will layer your stenciled designs. A high contrast color, like black or white, will allow the other colors that make up your design to stand out better. The smoothly sanded bottom of your board should be completely covered in an even, thin, layer of paint.
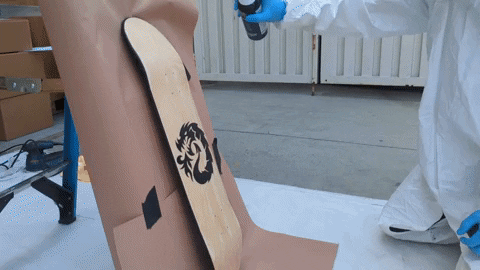
You do not want to apply the paint too heavy on the first pass. Just put enough to cover the surface and it is ok if some of the background shows through. This technique is called "tacking" and gives the next layers something to bond to in addition to the primer.
Once you are done with the tack coat, apply another layer of paint a bit heavier. Remember, less is more. You do not want to overdo it and get runs. However, you also do not want to go too thin as this will make the skateboard paint cloudy looking.
The paint on the 2-3 coats should look wet when finished, but not run. You could practice on a scrap piece of wood before moving on to your skateboard.
If you are layering colors, you must wait for the bottom layers to completely dry before applying tape, stickers, etc. If you do not, you risk ruining the finish and having to start over.
Step 5: Finishing
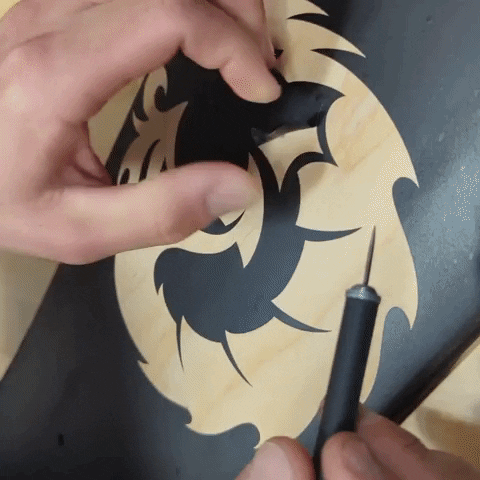
Remove your stencils or stencil sticker to reveal your graphic design. Do this when the paint is dry to the touch, but not 100% dry. We gave it about 1 hour before removing the sticker. This allowed for a smoother line and peel off process.
How do you seal paint on a skateboard?
Clear coat can be applied on top of the finished paint to further protect the paint. Follow the instructions on the clear coat, but usually you want to clear coat when the paint is still a little bit wet. This gives the clear coat material a better bond with the paint.
Clear coats should be applied 2-4 times and allow for about 20 minutes between coats. This is just a general direction and we always recommend reading the instructions for your specific material.
Depending on the clear coat / varnish and your desired finish, you may want to wet sand it once completely dry. Once the clear has been given 24-48 hours to completely cure, apply some water and wet sand with 2000-3000 grit sandpaper. Be really careful to sand through the clear coat and into the paint layer. This will ruin the entire finish! This will remove imperfections and make the clear cloudy looking. After, polish it using a polishing compound to get a high gloss shine.
Proper Clean Up
It is important to properly dispose of and clean up your extra paint and painting materials. Make sure you follow the laws about throwing away certain kinds of paints, etc!
Step 6: Hang It or Skate it?
The question is, once your skateboard is done being painted, should you hang your fine art piece or is it ready to skate? With all this work invested, hanging it for at least a few days to admire your hard work is recommended.

You can buy a skateboard hanger for pretty cheap, or at the very least, leave your custom skateboard deck leaning against a wall for a few days. We think hanging hand painted skateboards is the way to go though. You just did all that work to make a custom painted skateboard, don’t ruin it!
Wrapping Up
We hope that these six steps were pretty straightforward and easy to follow regarding how to turn your skateboard into skateboard art. It can be a little tricky for first-timers, but that doesn't mean it has to be an expensive or all-consuming activity.
We'd love to see your progress. Please be sure to share your original artwork with us at @stokedrideshop!
Community Q&A / FAQs / Troubleshooting
Here are some frequently asked questions when it comes to painting skateboards. If there are any other questions you have that we haven't answered, go ahead and contact us directly and we'll answer them to the best of our ability.
Can you paint over grip tape?
You can do this, but it will take away some of the grip's strength. The paint smooths out some of the grip surface, so thick paint will make it less tacky. If you paint grip, we recommend using high quality spray paint in light coats.
You can also use paint pens to write on skateboard grip tape. This is a fun and easy way to customize without the paint mess.
Can You Use Acrylic Paint on a Skateboard?
Yes, you can use acrylic paint to paint a skateboard. It is a great option as clean up is a lot easier when the paint is water soluble.
Once the skateboard is primed, you can use the acrylic paints and brushes to apply your personalized graphic.
Can You Use Spray Paint on a Skateboard?
Yes, we recommend spray paint/primer as the #1 choice for the base coat when painting a skateboard. It is quick, easy, and will give the best coverage.
Spray paint may not allow for finer details in your graphic design, depending on what kind of graphic you are trying to accomplish. However, it can give a cool street art aesthetic to your diy skateboard.
Vinyl stickers can be used as a template for your spray paint graphic. First test a small area to make sure the sticker does not remove the paint when it is taken off. Then you can apply the sticker and lightly coat the skateboard. When you remove the sticker, the design will be painted. Sticker stencils are ideal for more pop art types of designs.
Can You Use Watercolor Paint on a Skateboard?
Not really. Watercolors work best on porous surfaces, such as paper or canvas. The wood surface of a skateboard does not reproduce that signature watercolor look. Skateboards that have a watercolor graphic are simply replicating the look/feel of watercolor using other printing methods.
Can You Clear Coat a Skateboard?
Yes, if you prefer the natural wood color of your skateboard, you can use a clear coat. You can also clear coat your paint for extra protection. Read more about that in Step 5.
Thanks for reading! If you have questions, you can comment below or email us at help@stokedrideshop.com.